Integrations | How to Change Device DNS Settings
Learn how to update default DNS settings to specific Google DNS servers.
Your Internet Service Provider (ISP) may make changes to their systems that prevent default DNS settings on your devices from working and therefore connecting to Greenline's services.
In the event that your ISP is no longer able to connect to Greenline's dashboard or POS, we recommend updating the default DNS settings on your devices to specific Google's specific DNS servers.
This article will walk through the steps necessary to update your iPad, Windows, MacOS and Android devices with new DNS settings.
Update DNS Server Settings on iPad
-
From the iPad’s home screen, tap Settings.
-
Tap Wi-Fi on the sidebar. The screen shown below appears:
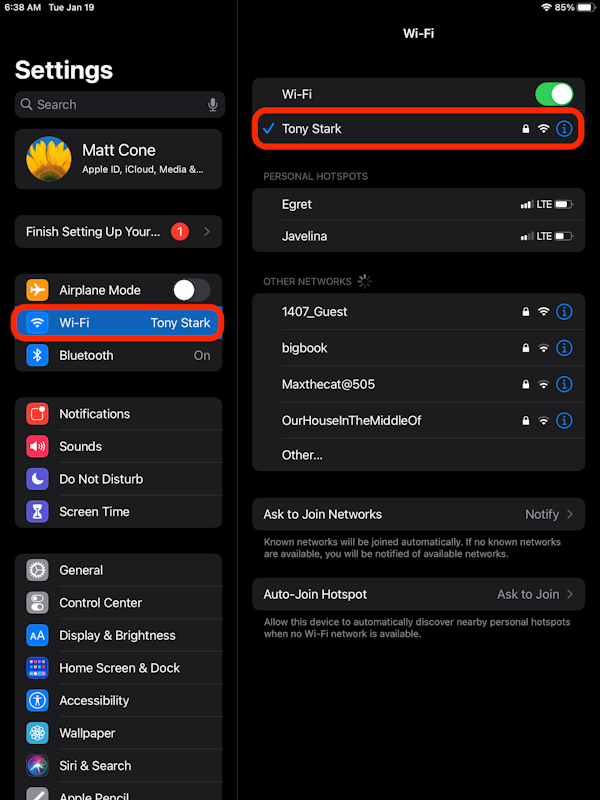
- Tap the connected Wi-Fi network. The window shown below appears:
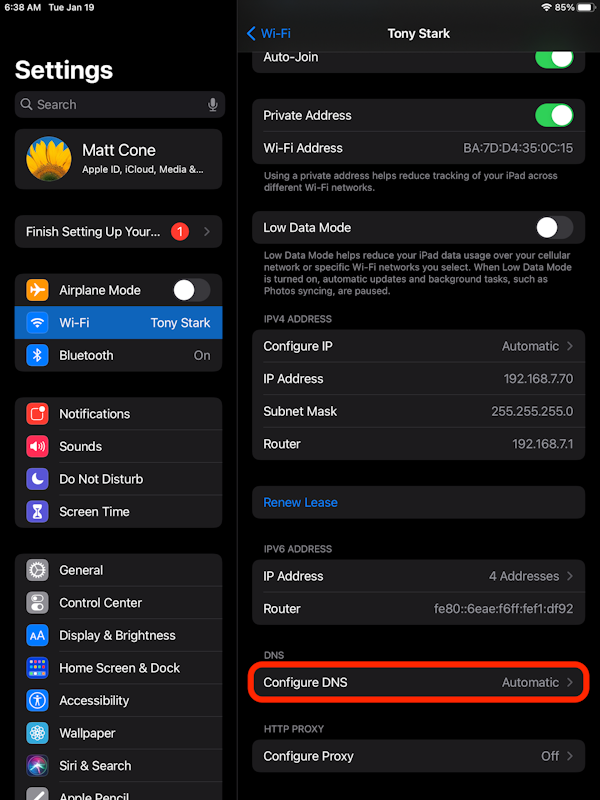
- Tap Configure DNS. The window shown below appears:

- Tap Manual
- Delete the current DNS servers
- Click Add Server and input the following details: 8.8.8.8
- Click Save
That's it! You've updated your iPad's DNS servers!
Changing DNS Settings on an Android Tablet
- Go to Settings > Wi-Fi > Long press on your current network > Modify network > Advanced options
- Change IP settings from DHCP to Static
- Enter your preferred DNS addresses in the DNS 1 and DNS 2 fields, in this case 8.8.8.8
- Save the changes and disconnect from the network
- Reconnect to the network to apply the new DNS settings
Changing DNS Settings on a Windows Device
1. Go to your settings and open Network and internet
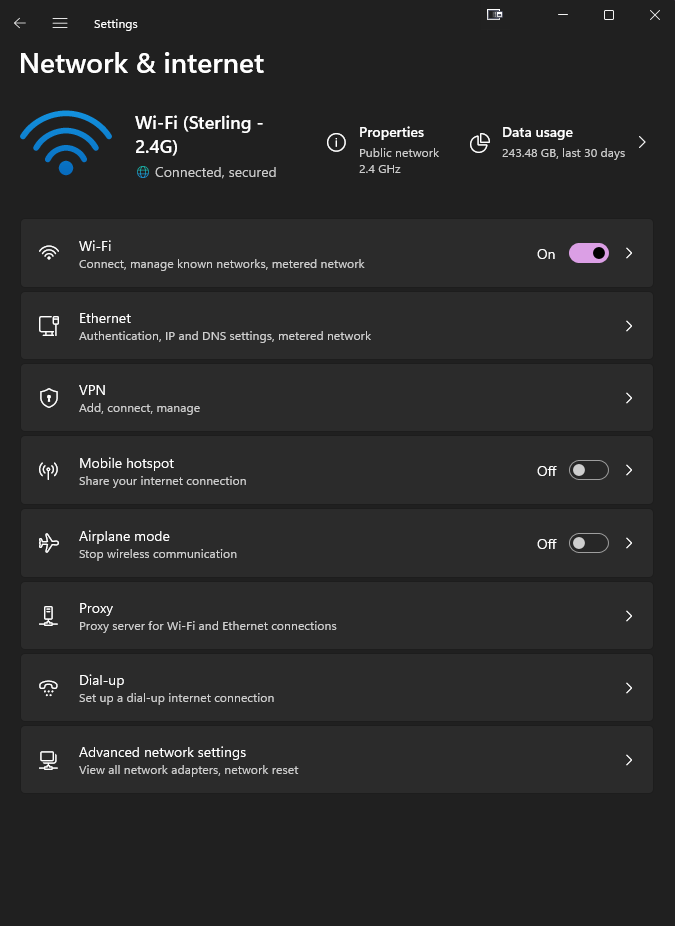
2. Click on Wifi or ethernet depending on how your system is connected and click on your connection.
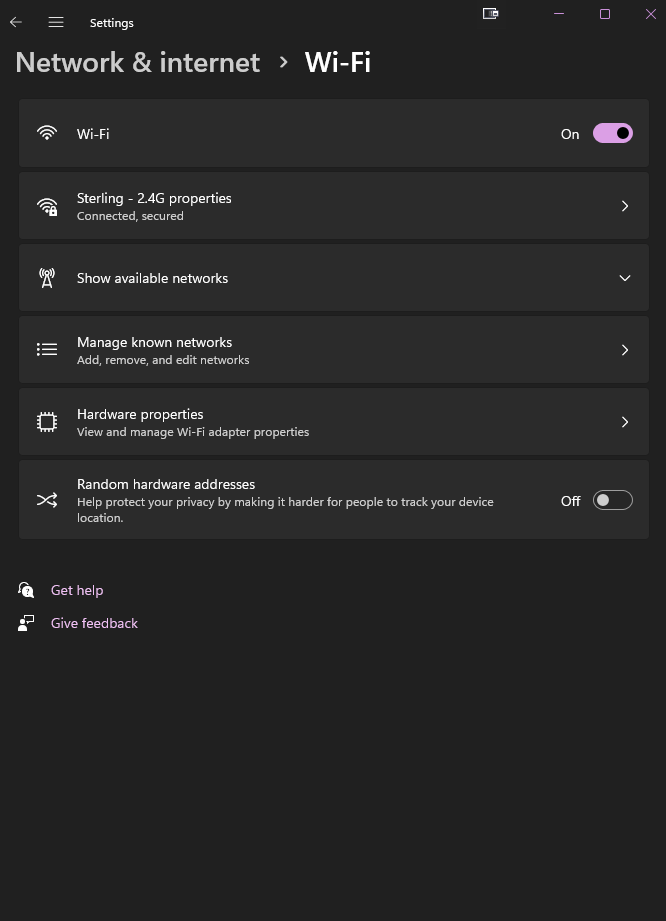
3. Edit network DNS settings to 8.8.8.8 or 8.8.4.4
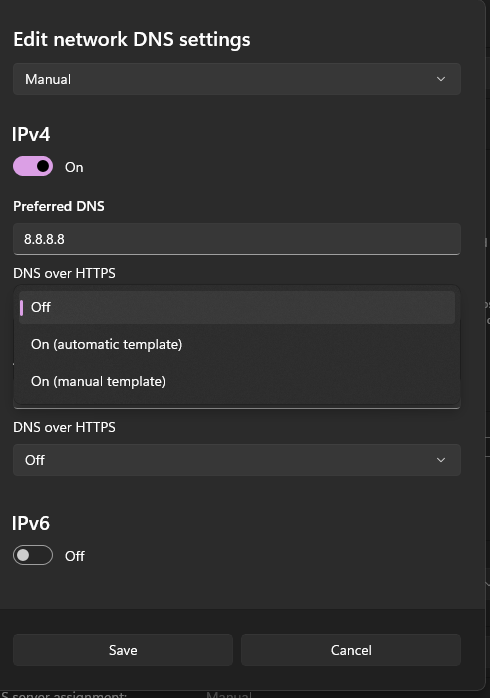
4. Click Save
Changing DNS Settings on MacOS
1. Open settings and go to WiFi
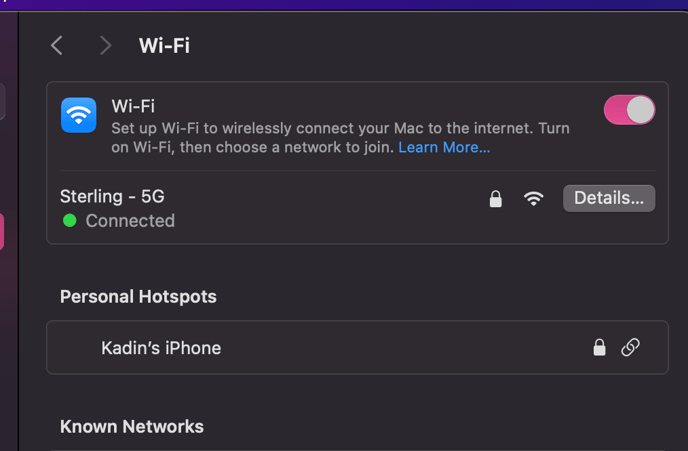
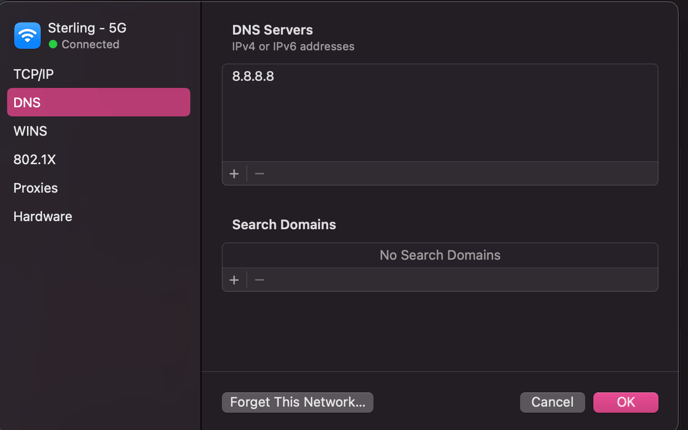
2. Click on details and DNS
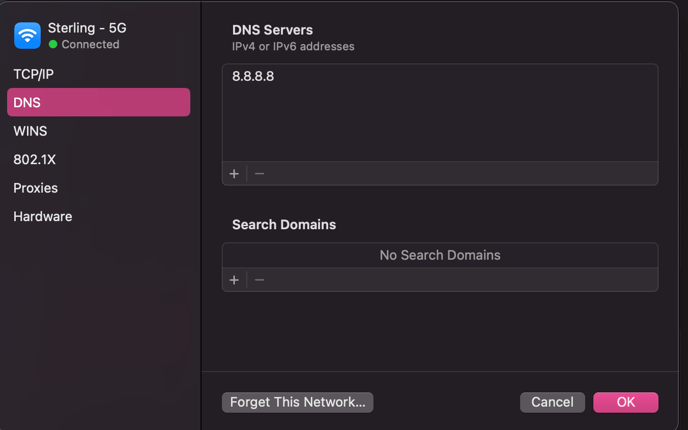
3. Click on the plus sign (+) to add DNS record 8.8.8.8 and press OK
