-
Click here for the full TSP100iiiL series operation manual. (Scroll to the bottom to the Windows portion).
-
Click here for an overview with illustrative instructions.
*Use the above links for any additional troubleshooting that is needed after working your way through this guide.
NOTE: TSP100iiiLAN is the only TSP series that is supported by WebPOS.
Ensure you are using Chrome as your browser. If you do not currently have it, the latest version can be found here
TSP100iiiLAN Setup
-
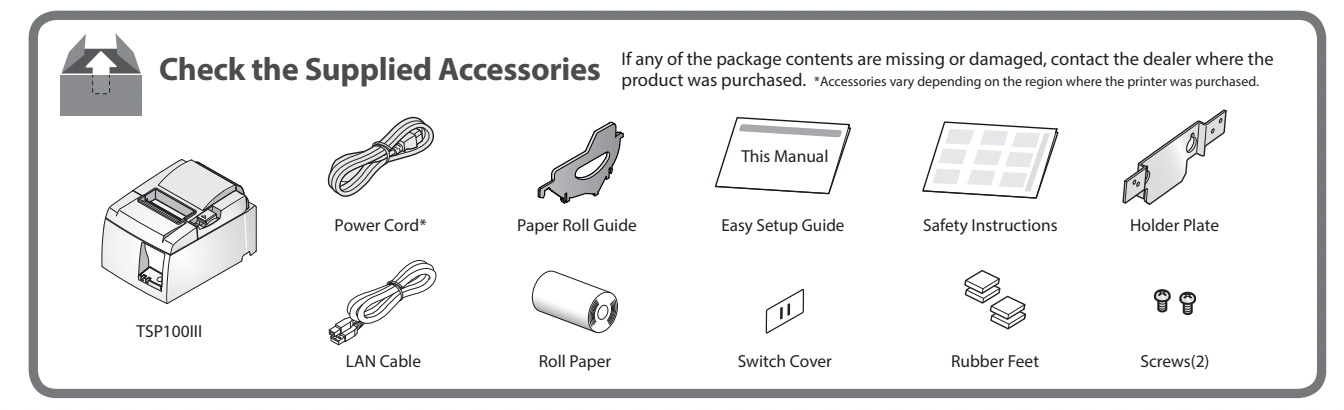
Supplied Accessories

-
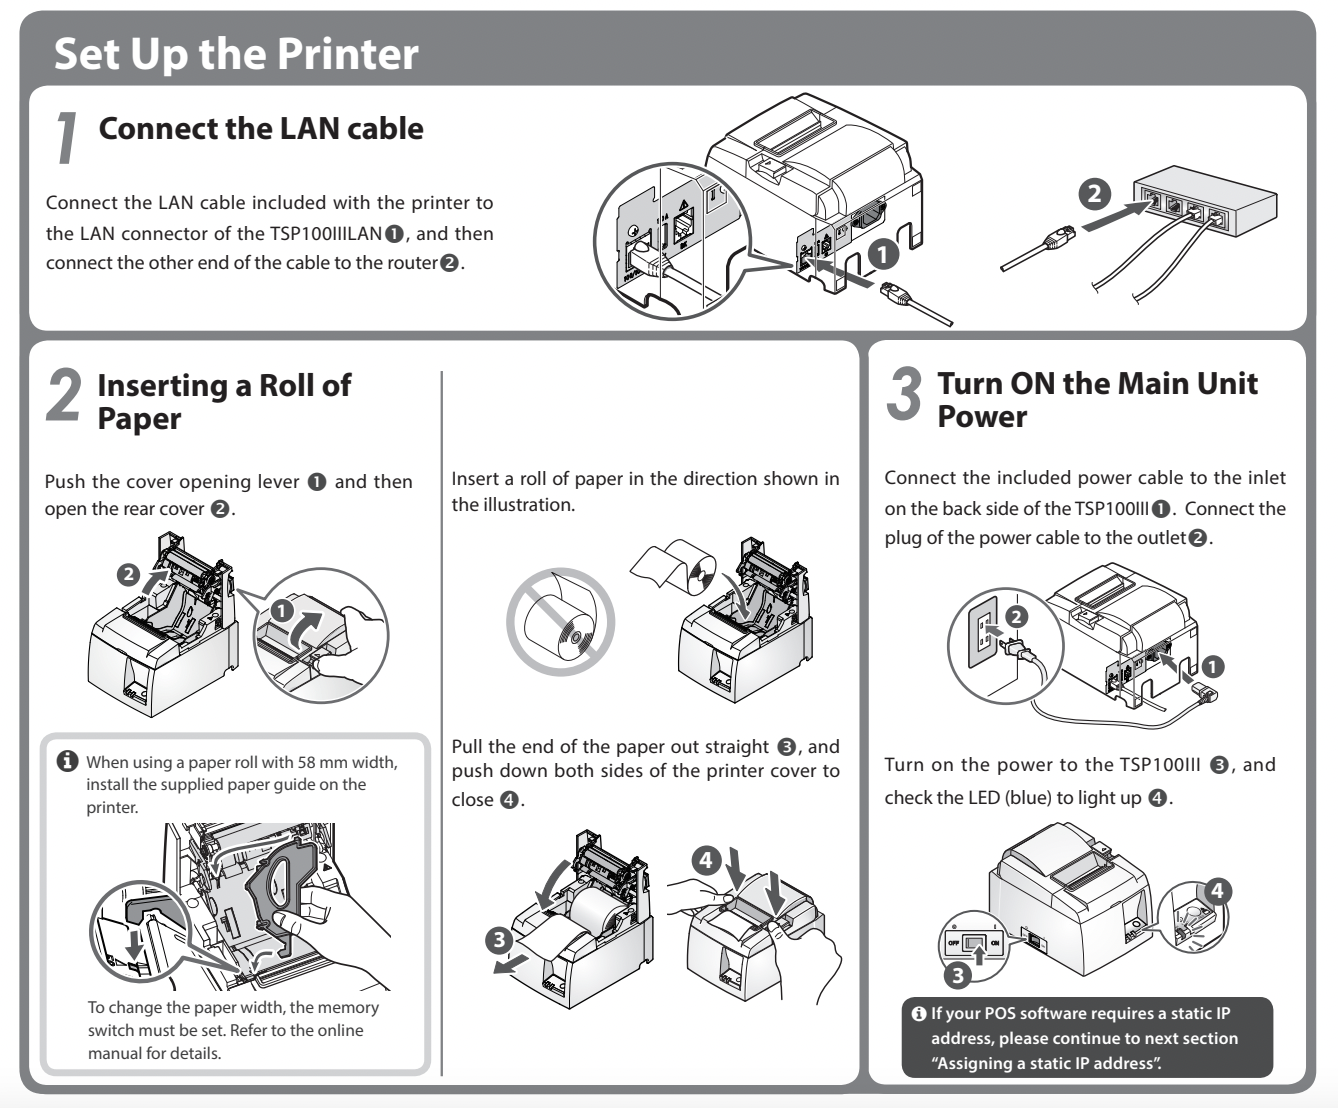
Printer Setup
 Setting up the Star TSP100 for Windows PCBefore getting started
Print the Network Configuration and Current IP Parameters Status receipts:
-
Turn the printer off.
-
Hold the feed button down and turn the power back on at the same time.
-
Release the feed button. This will print out two test receipts.
At the bottom of the second page, it will show Current IP Parameters Status.
Note:
Hang on to this page and make a note of the IP Address, this will be used later.
Your IP address will be different from the one in the below image.
-
Supplied Accessories
Printer Setup
Setting up the Star TSP100 for Windows PC
Before getting started
Print the Network Configuration and Current IP Parameters Status receipts:
-
Turn the printer off.
-
- Hold the feed button down and turn the power back on at the same time.
-
Release the feed button. This will print out two test receipts.
At the bottom of the second page, it will show Current IP Parameters Status.
Note:
Hang on to this page and make a note of the IP Address, this will be used later.
Your IP address will be different from the one in the below image.

Downloading and setting up the Star printer driver
Download the latest printer drivers for Windows PC.
This is specialized software that allows the printer to run correctly on your computer.
1. Go to the Star Micronics website and click TSP100 futurePRNT Software Lite.
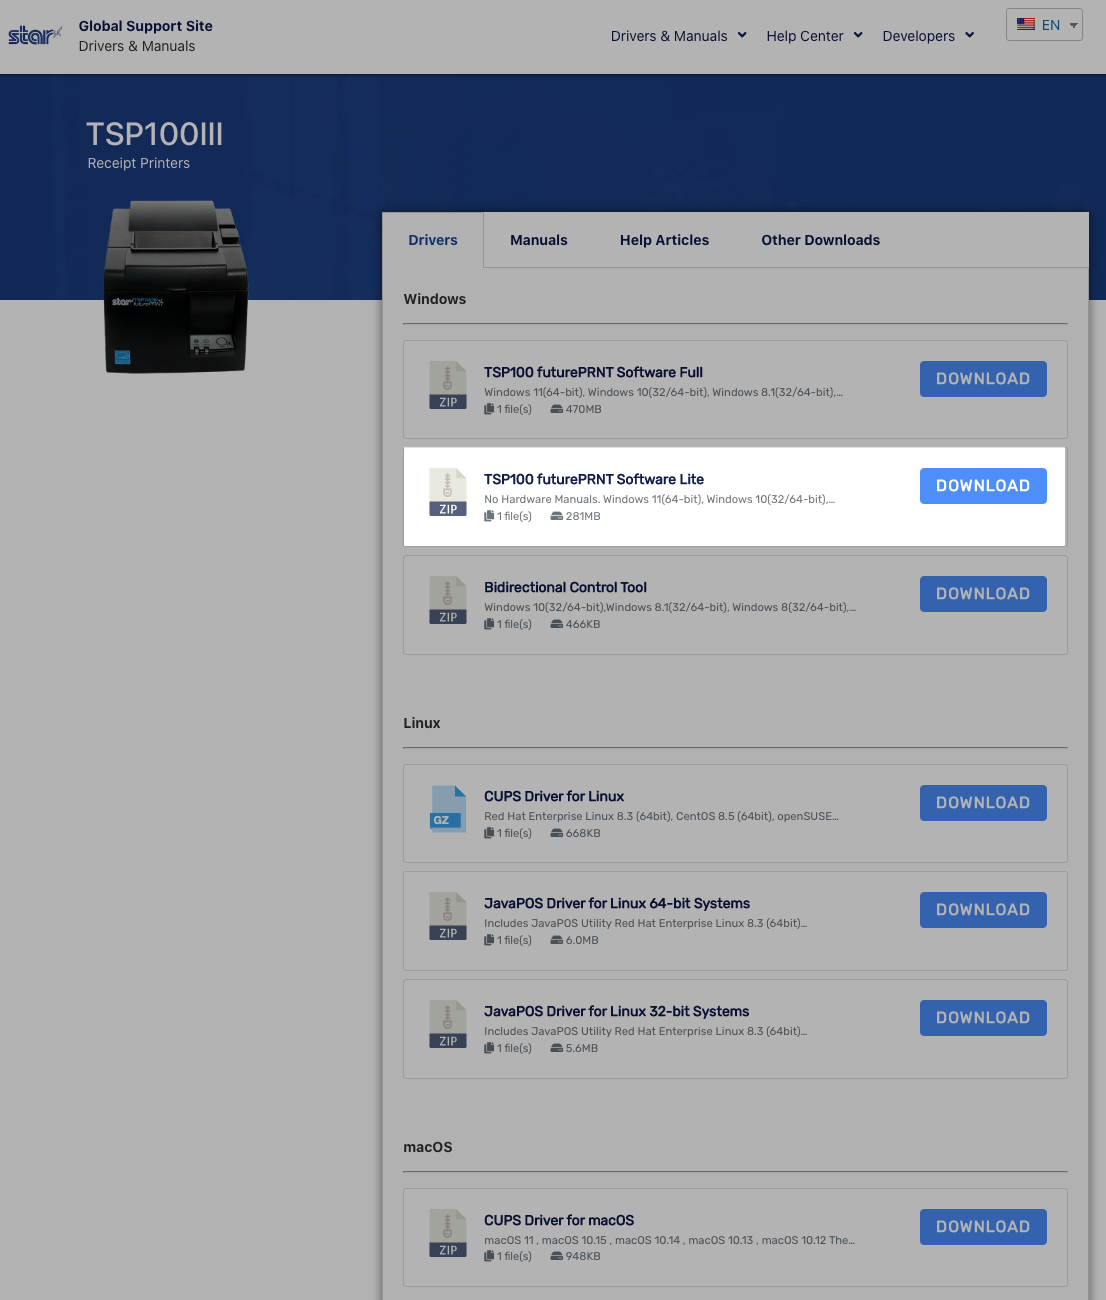
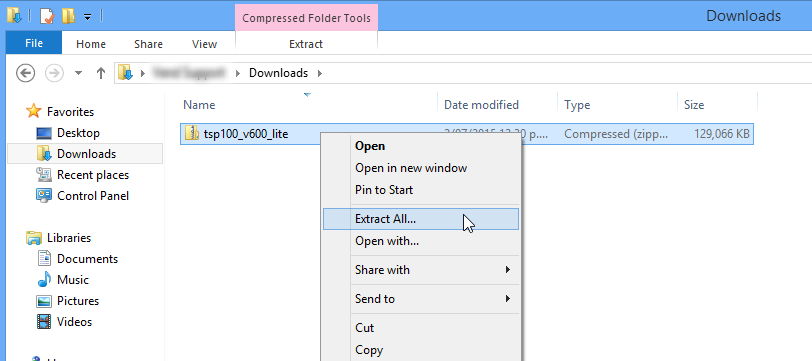
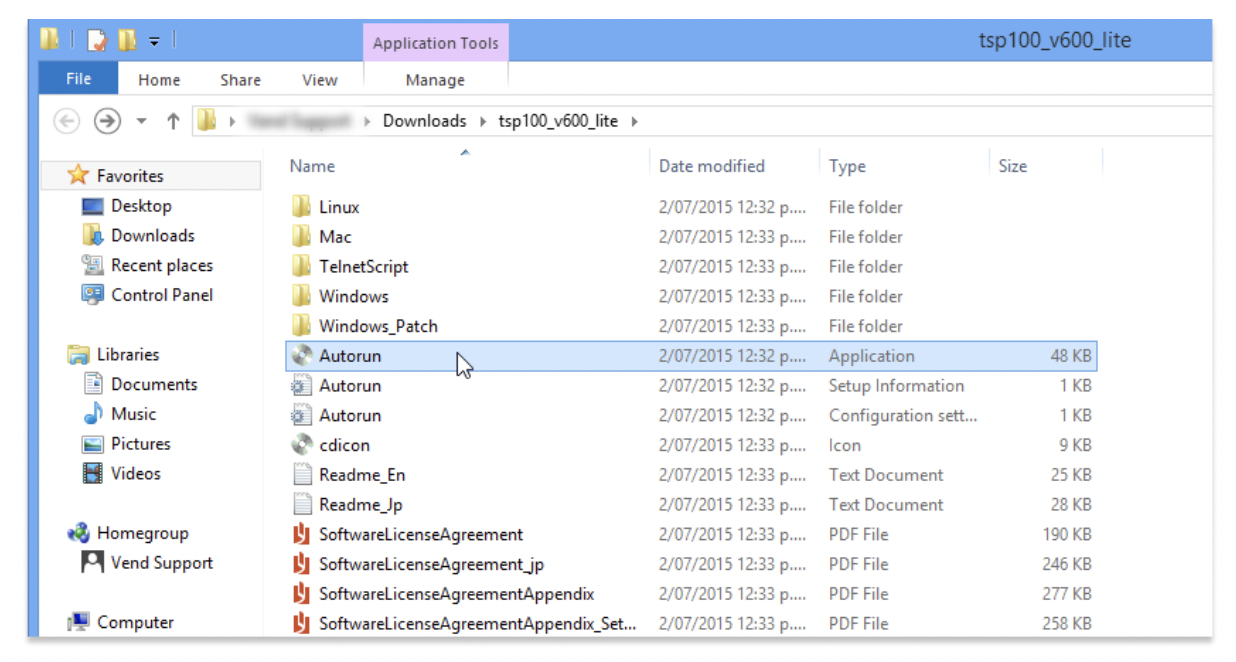
2. When the download is complete, go to the Downloads folder on your computer, and locate the folder called "tsp100_v600_lite. This is a compressed .zip folder containing multiple files. Right-click on the downloaded folder and select Extract All.
3. After extracting the file, a new folder will open. Double-click on Autorun (Application Type), click install and choose typical (not custom) and follow the installation guide instructions.
4. You will now need to exit the installer.
Installing your Star Printer
Now that this is complete we'll need to install the printer on your PC. To do this:
-
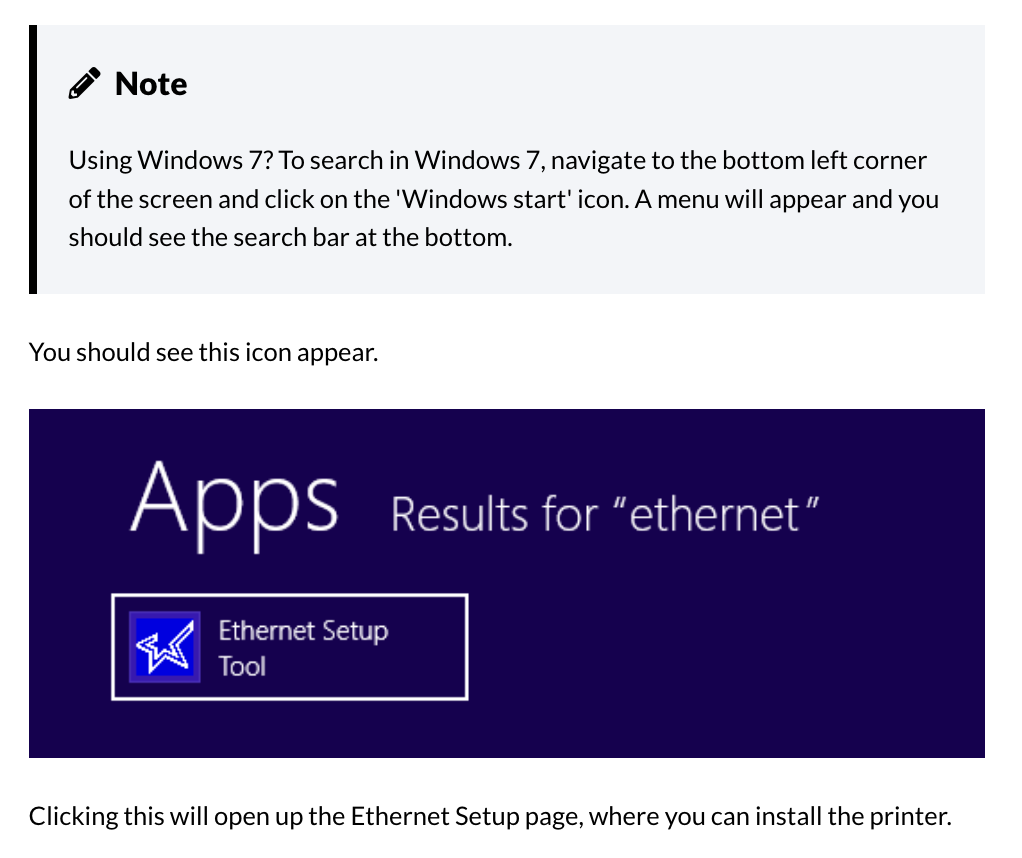
Go to Windows Start Menu > Programs > Apps > All Apps > StarMicronics > LAN & Bluetooth Setup Tool.

Go to Windows Start Menu > Programs > Apps > All Apps > StarMicronics > LAN & Bluetooth Setup Tool.
OR
-
Use Windows Explorer to locate the folder by following the folder path shown in the image below.
Use Windows Explorer to locate the folder by following the folder path shown in the image below.
NOTE: If you are using Windows Explorer, you may want to search for "EthernetSetting" as will save some time. This file will live inside the StarMicronics folder.
The image below is a gif and walks you through the process. We suggest watching it through a first loop before following along.
Set a Static IP address to the printer from Web Configuration
Using the printout of the network configuration you did in the beginning, take the printer IP address and type it into the Chrome search bar
Setting Static IP Address
-
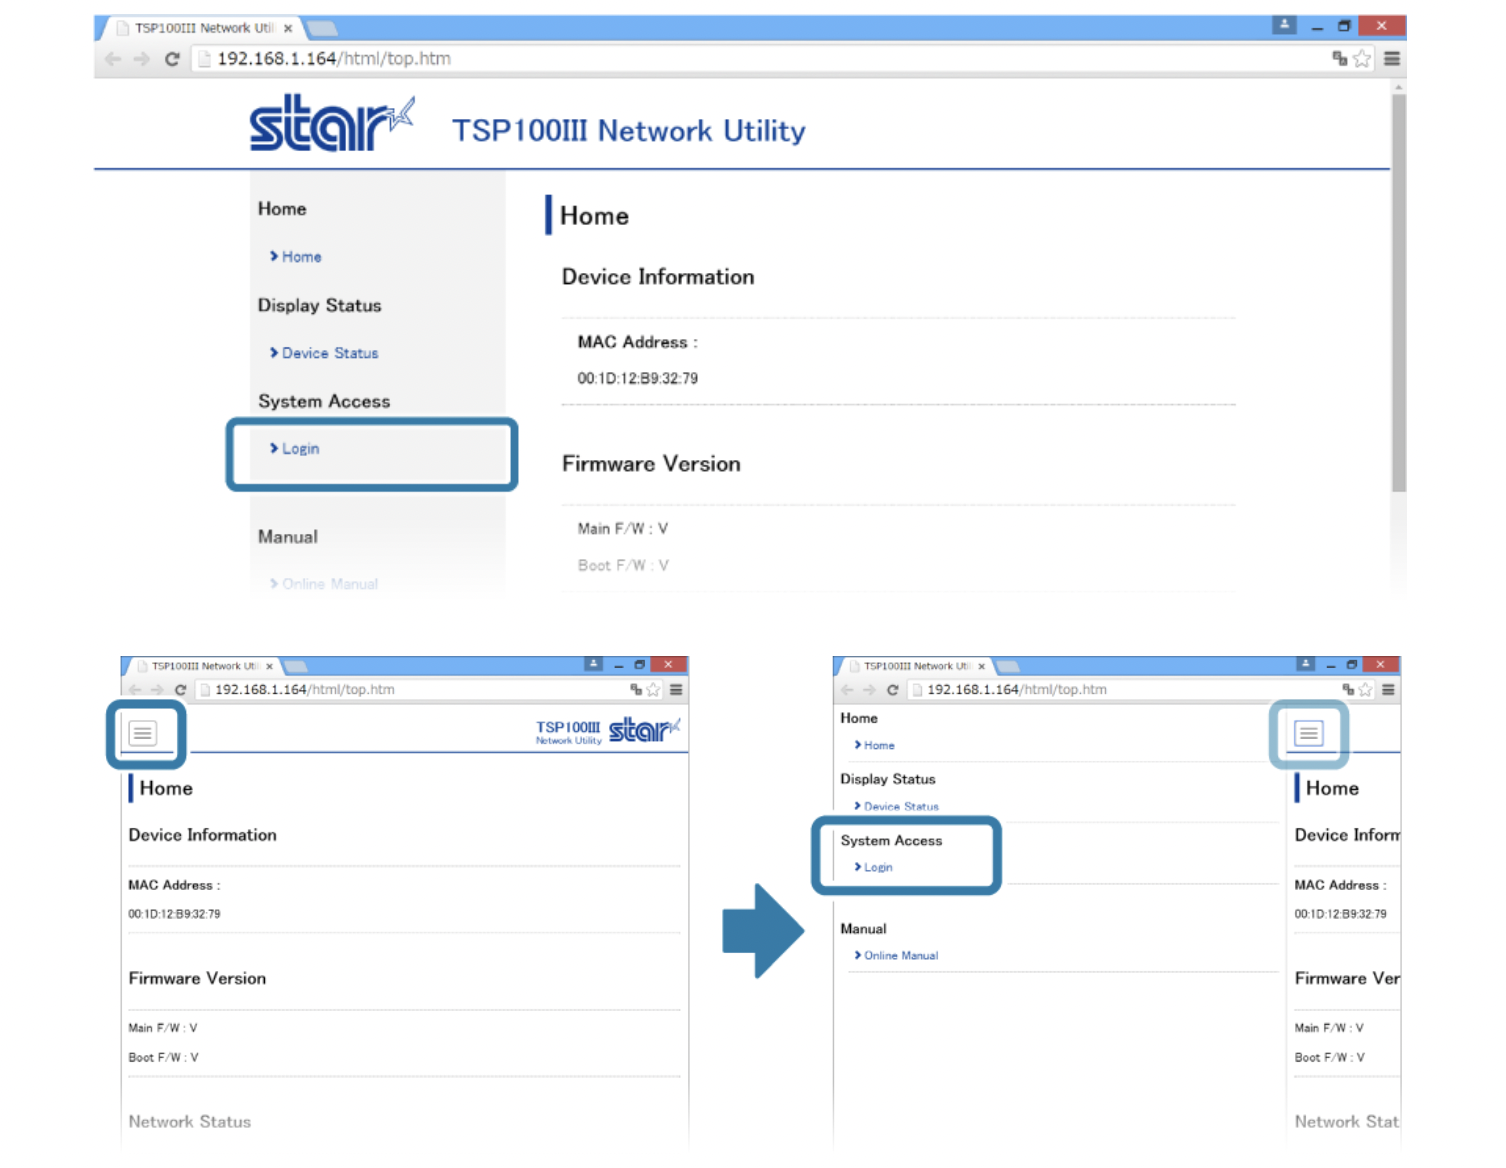
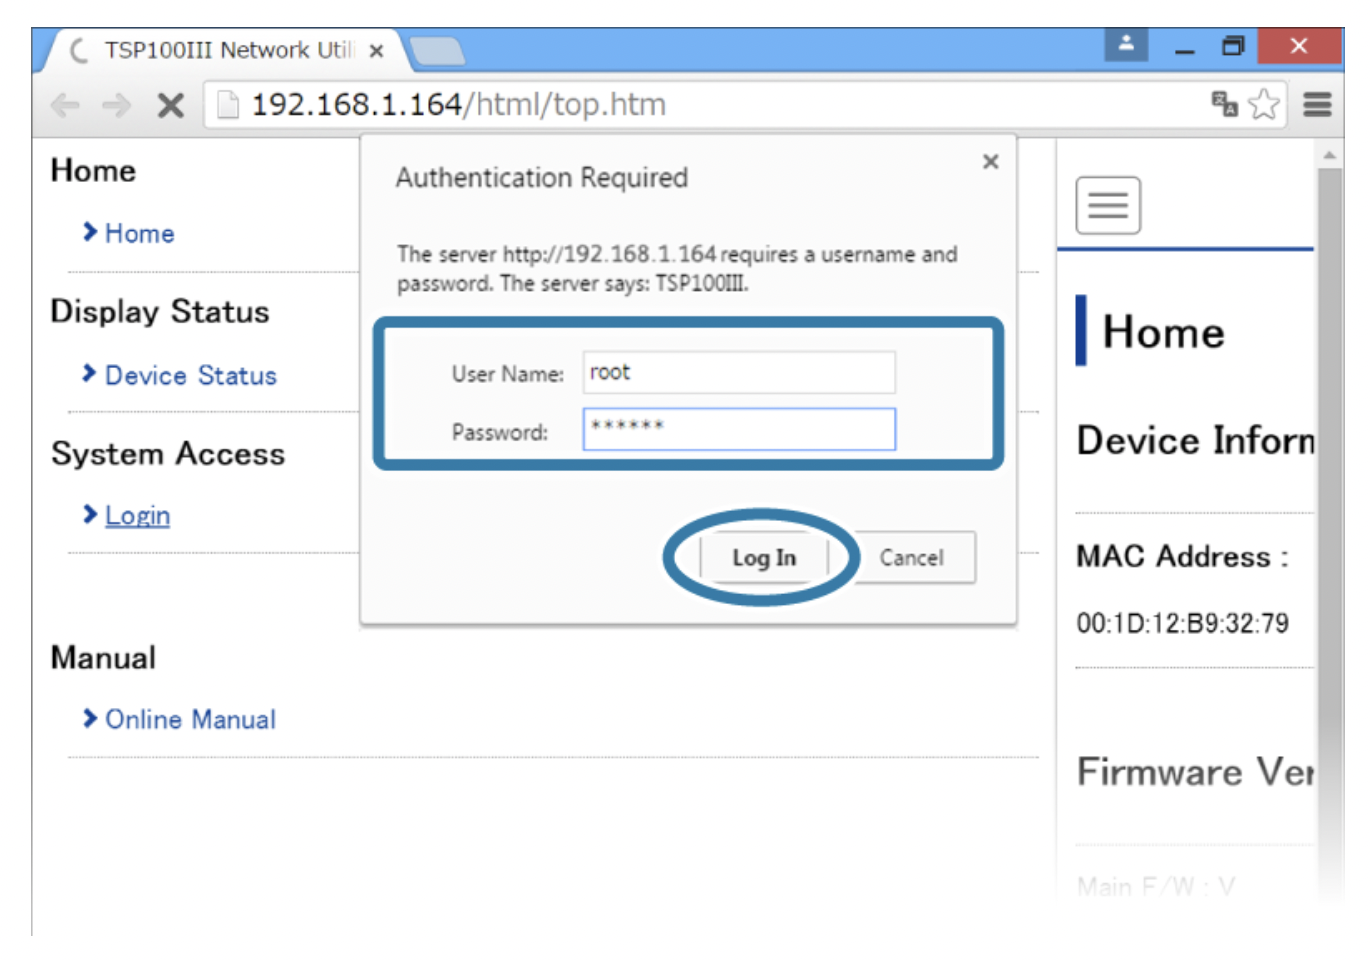
Open your web browser and type in the Star printer’s IP address into the URL field
-
Log into the Star Network Utility using these credentials; User: root, Password: public
-
It may prompt you to change the password but this is not necessary, press cancel.
-
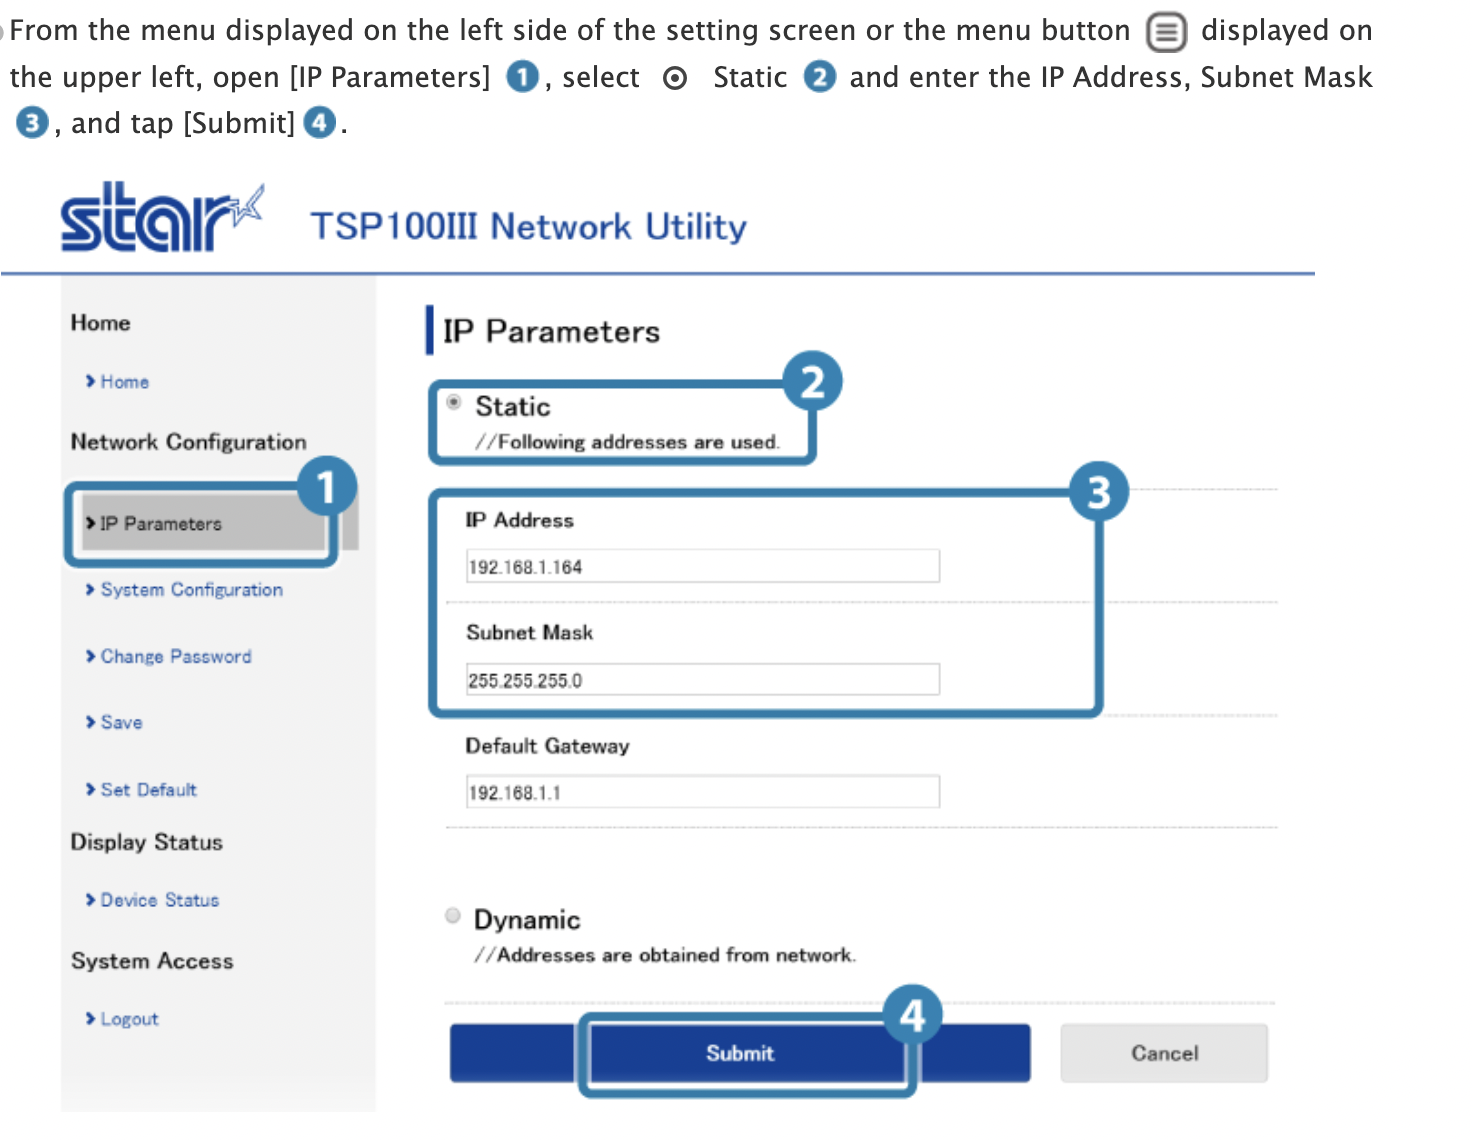
On the left-hand side menu, click IP Parameters and select static. The current IP Address and subnet mask should autofill in
-
If the current IP Address and Subnet mask do not autofill, manually type in the network configuration obtained from the printer as explained above
-
Select Submit
-
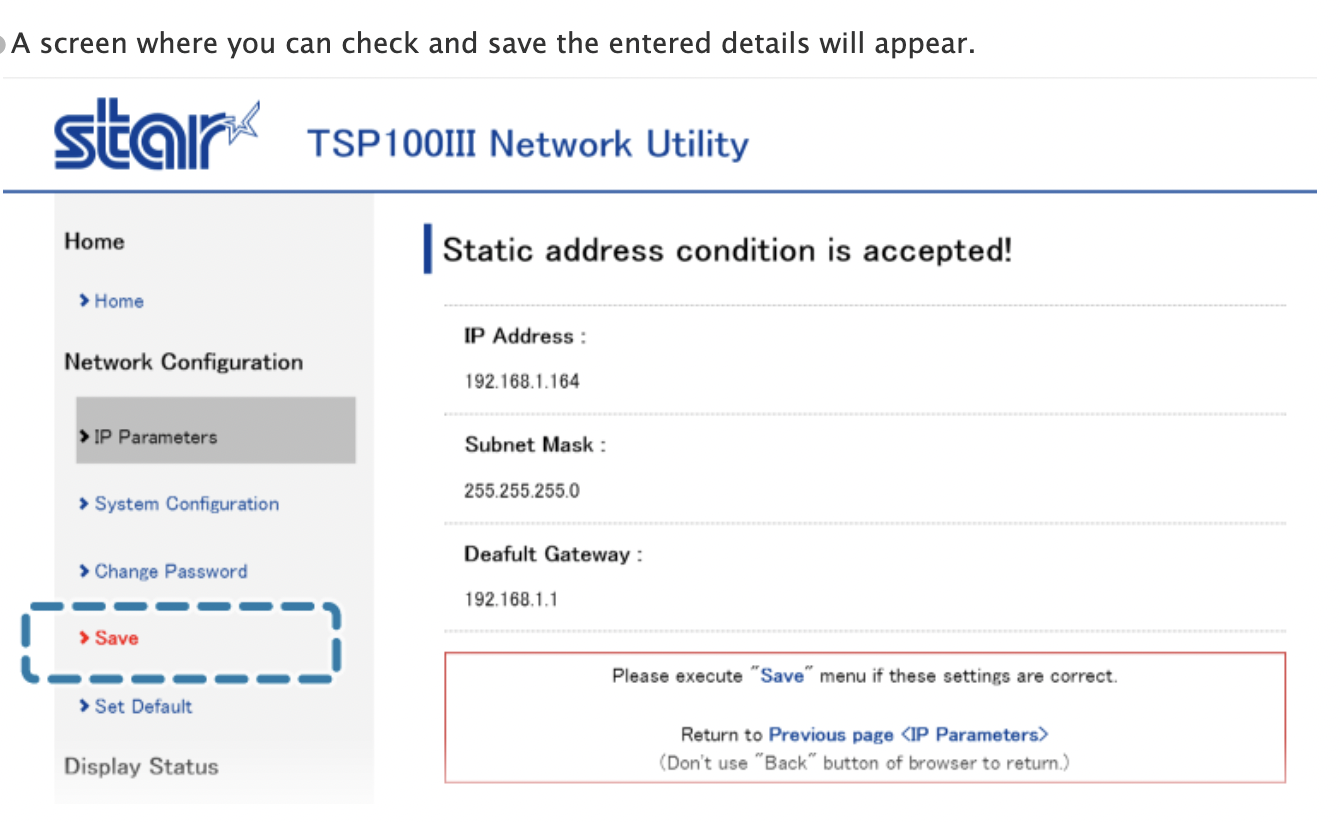
Select Save on the left-hand side menu
-
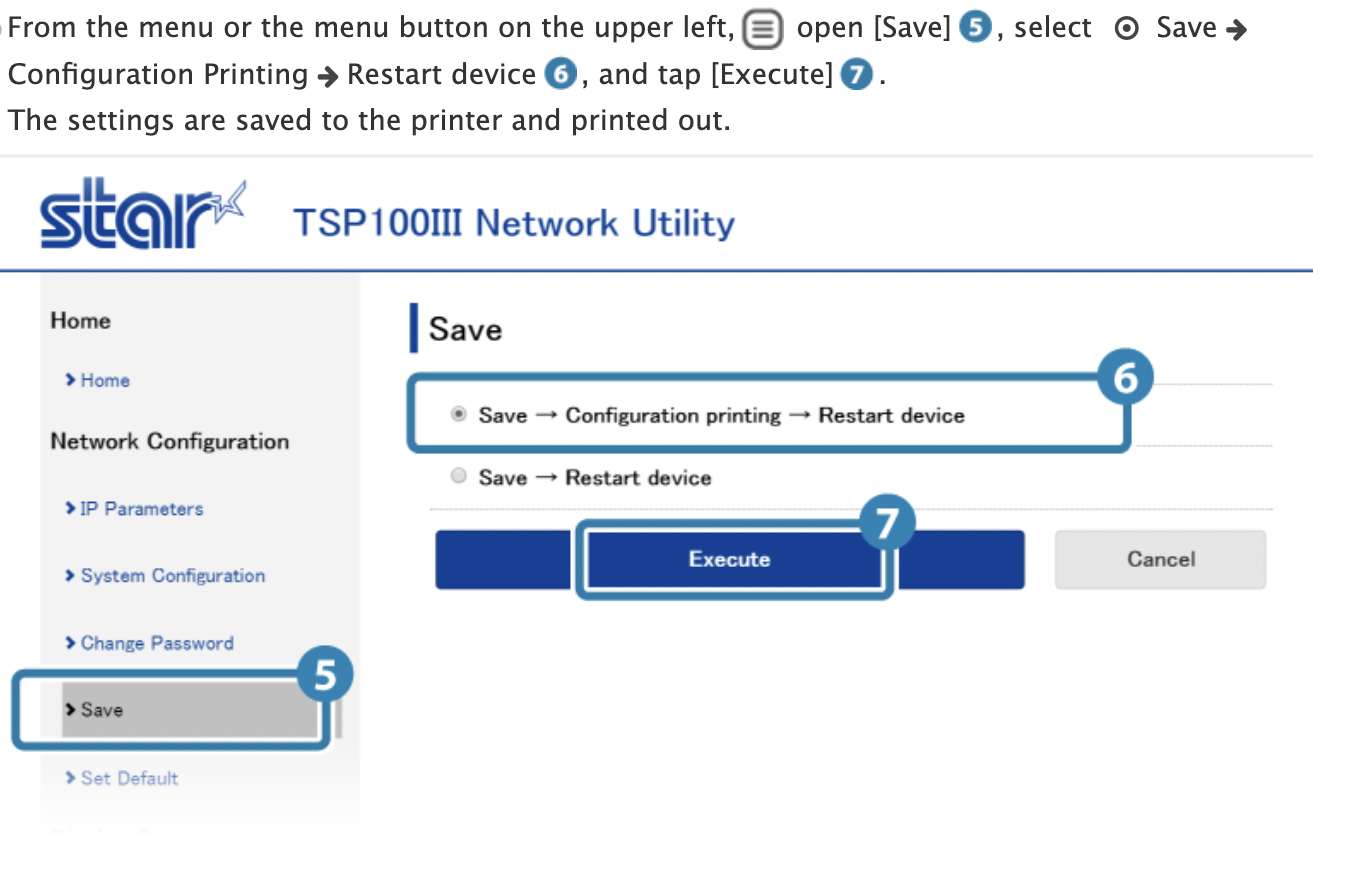
Select the option Save, then click Execute
-
The receipt printer should restart and print a new configuration report with Static next to the IP address instead of
Note: If the Star TSP100 is not your default printer, click Change and select the printer from the list.
You will also want to untick headers and footers and set the paper size to 72mm - 2000mm or 72mm - receipt.
If your receipts are printing out much longer than they need to be, please check your settings and ensure that your paper source is set to FRICTION and not automatic.