Greenline has partnered with Venture Sourcing Group, a Canadian-based hardware provider whose aim it is to streamline how you purchase technology and point of sale hardware.
Please see the Venture Sourcing Group's website at the link below for more information:
Connect the scanner through your mC-Print3 series printer to your POS
The Star Micronics scanners offer hand-held or free-standing scanner options that can connect over USB.
Note: click here for the Star Micronics scanner user manual. This article will simplify the information needed for you to get started quickly.
The scanner must be connected directly through your mC-Print3 Series printer to be utilized on BLAZE POS. The printer should be connected before setting up your scanners. Click here for a guide on connecting your printer.
-
BSD-FR4080 (Table-top USB)
-
BSH-HR2081 (Handheld USB)
Connecting the Scanner to your mC-Print3 Printer:
BSD-FR4080
-
Plug the provided RJ45/USB cables RJ45 connector into the data port located on the back of the scanner.
-
Plug the cables USB connector into the USB port on your mC-Print3 printer. Ensure the scanner is plugged into the correct USB port (labelled 2.4A) to receive the appropriate power.
BSH-HR2081
-
Connect the scanner's wired USB cable into the USB port on your mC-Print3 printer. Ensure the scanner is plugged into the correct USB port (labelled 2.4A) to receive the appropriate power.
Connecting the Scanner to BLAZE POS:
-
Log into the BLAZE POS Device that you want to pair the scanner with
-
Tap the GR logo in the top left corner to reveal the hidden menu
-
Tap "Settings"
-
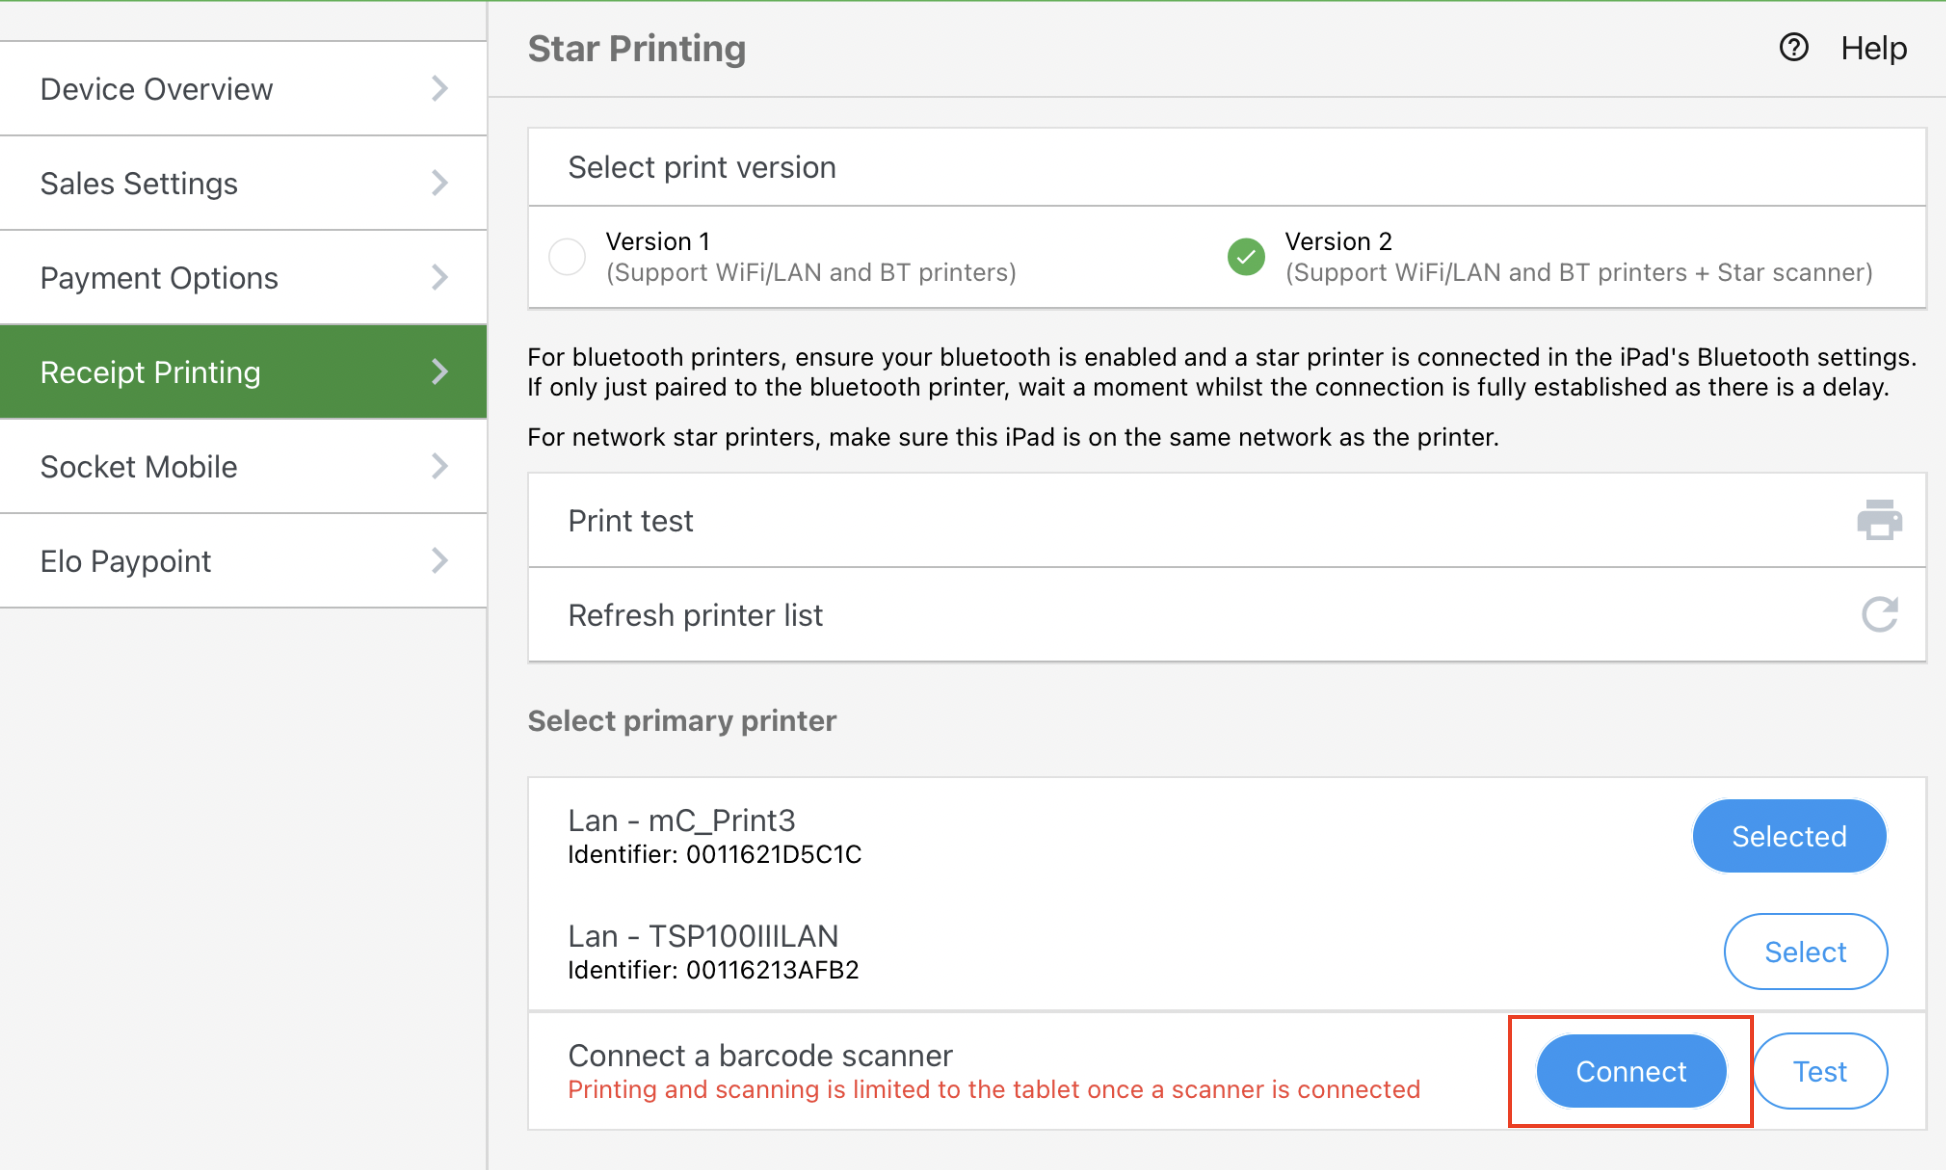
Tap "Receipt Printing"
-
Your mC-Print3 printer should be selected and you will see the option to also connect a barcode scanner underneath
-
Click "Connect" and run a test scan if needed. When you scan a barcode you should see it populate in the pop-up test window.