Hardware | Symbol / Zebra 2D Barcode Scanner Setup
Connect the scanner through your mC-Print3 series printer to your POS
Symbol and Zebra's scanners have built-in stands and can easily be used for either table-top or hand-held scanning. They use a USB connection.
The scanner must be connected directly through your mC-Print3 Series printer to be utilized on BLAZE POS. The printer should be connected before setting up your scanners. Click here for a guide on connecting your printer.
-
Symbol DS9208 (Table-top/handheld USB)
-
Zebra DS9308 (Table-top/handheld USB)
Connecting the Scanner to your mC-Print3 Printer:
-
Plug an RJ45/USB cables RJ45 connector into the data port located on the back of the scanner.
-
Plug the cables USB connector into the USB port on your mC-Print3 printer. Ensure the scanner is plugged into the correct USB port (labelled 2.4A) to receive the appropriate power.
Connecting the Scanner to BLAZE POS:
-
Log into the BLAZE POS Device that you want to pair the scanner with
-
Tap the GR logo in the top left corner to reveal the hidden menu
-
Tap "Settings"
-
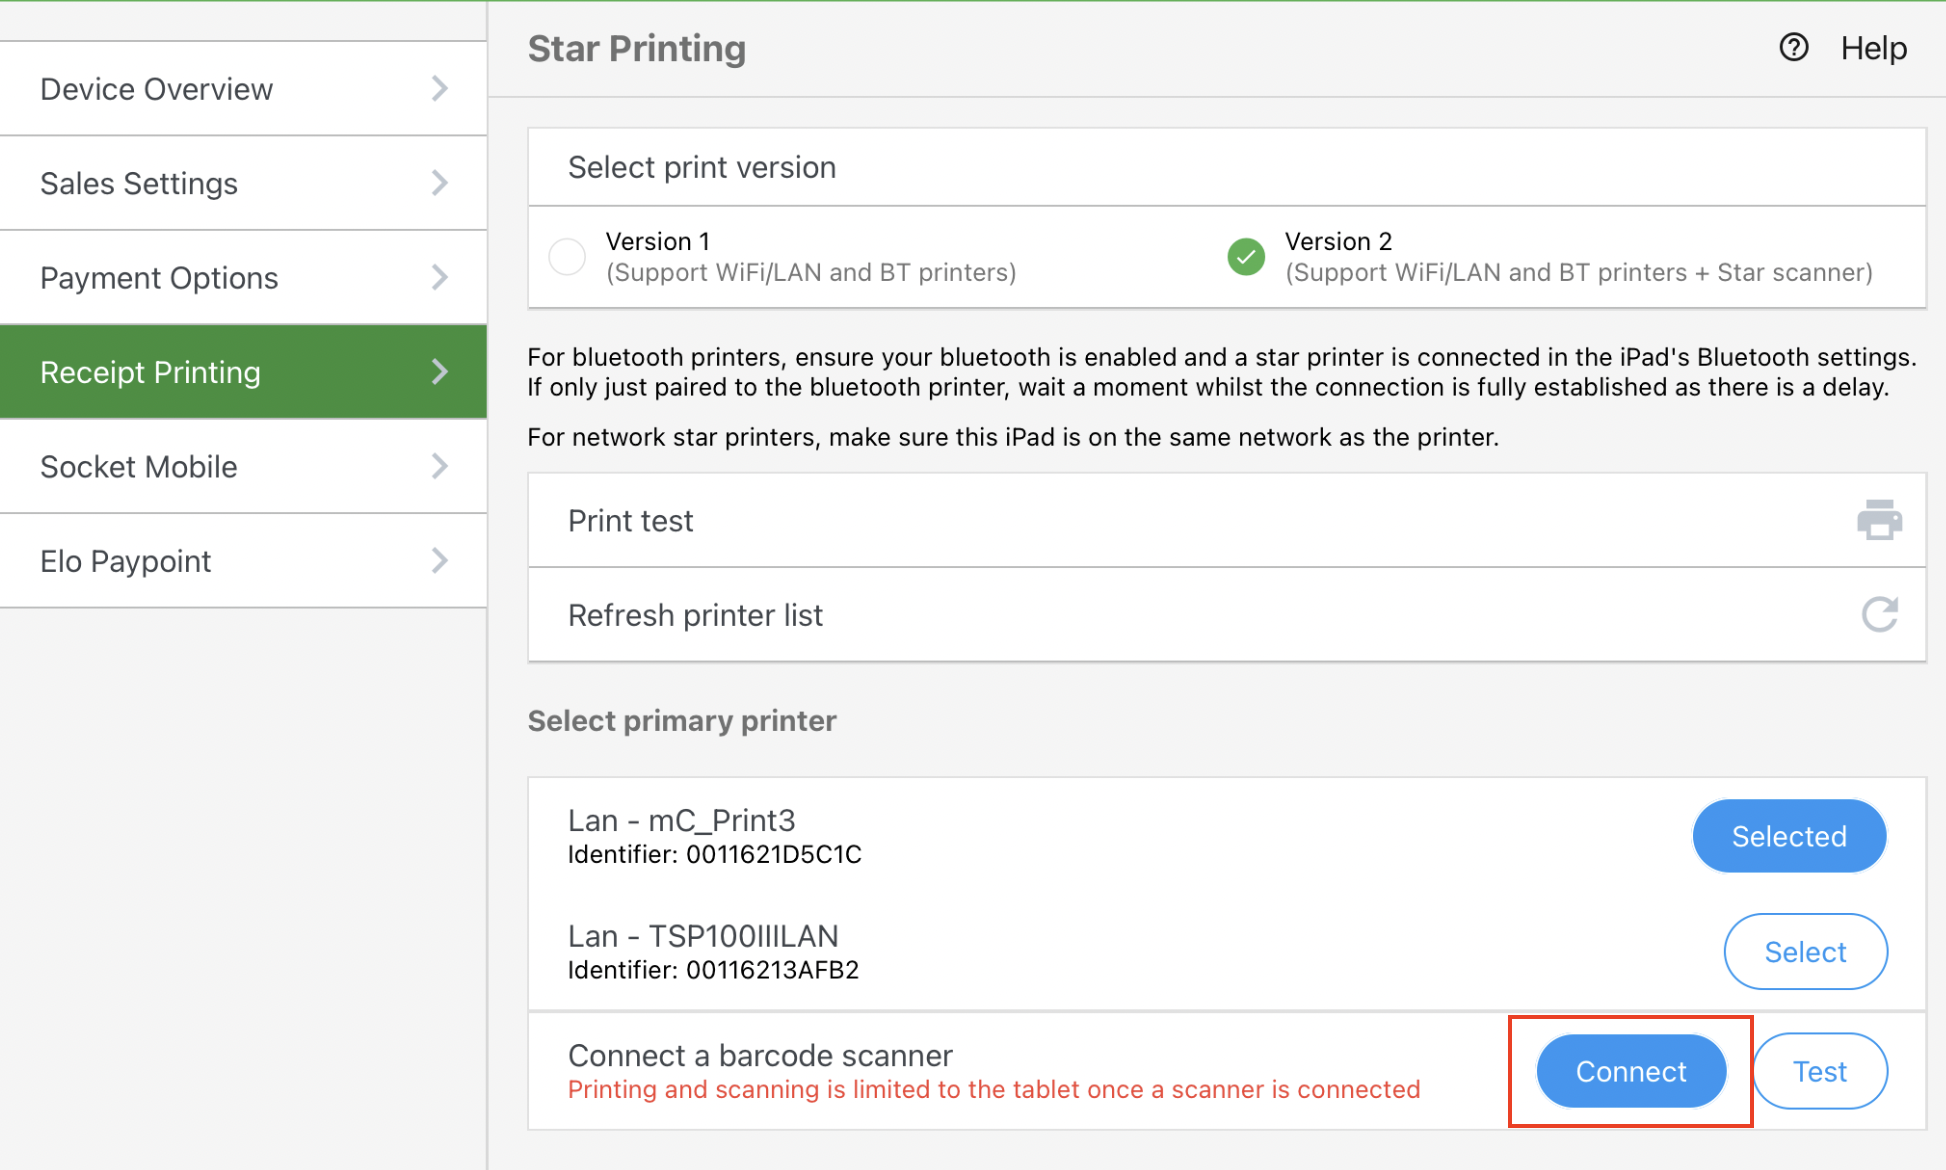
Tap "Receipt Printing"
-
Your mC-Print3 printer should be selected and you will see the option to also connect a barcode scanner underneath
-
Click "Connect" and run a test scan if needed. When you scan a barcode you should see it populate in the pop-up test window.
