How to utilize Greenline's customer loyalty at your retail store
⚠️ The Canadian cannabis industry has many regulations and running a loyalty program at your store is not exempt from that. Please review your province's regulations before implementing a loyalty program at your store and use this feature at your own discretion.
-
Define how many points per dollar to have in your loyalty program.
-
Add customer profiles (for more information on how to do this click here).
-
Segment your customers into different loyalty tiers.
-
Add scannable membership IDs to customer profiles to quickly add them on the POS.
-
Manually edit customer loyalty point balances.
Configuring loyalty points
By default, loyalty points are set to be $1 = 100 points. If you were using Greenline before April 2023, your existing dollar balances have been automatically converted to points.
To configure your loyalty points, go to your Dashboard > Customers > Loyalty page. At the top of the screen, you will see the points to dollar input fields.
It’s important to note that adjusting these values will adjust the value of existing points, not the number of points themselves. To bulk adjust the points across your customers, please go to your customer list (Dashboard > Customers > Customer list) and go through the “Loyalty balance” importing process. By using simple Excel formulas, it is straightforward to mass update everyone’s balances.
How to Set up Customer Loyalty Tiers on your Greenline Account
-
On your Dashboard, navigate to Customers > Loyalty
-
On the loyalty page, you will be able to create loyalty tiers. To create a new tier, click the "+ Add loyalty tier" button in the top right corner of your page.

-
This will initiate a pop-up that allows you to customize the loyalty tier. Here you can add;
-
Loyalty tier name
-
Description of tier
-
Choose whether you want to set up your credits as a per visit or per spend (more information below)
-
A minimum purchase threshold (optional)
-
The option to set this tier as your default (all new customers will be added to this loyalty tier automatically)
-
An option to apply this tier to all existing customers
-
A summary of your loyalty tier to ensure the settings are configured to your needs
-


Loyalty Tier Settings: Per Spend vs. Per Visit
Greenline allows users to choose between two types of loyalty tiers:
-
Per Visit
-
Per Spend
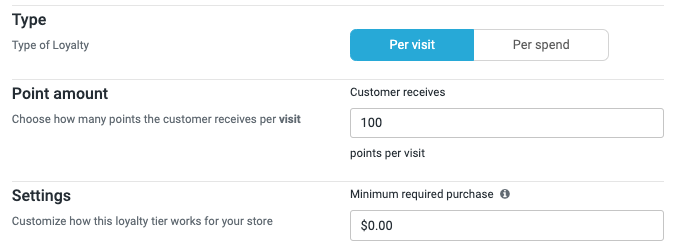
Per Visit
The "Per visit" setting will grant loyalty credits to your customer each time a transaction is completed at your store, regardless of how much the customer spends.
-
Set the "Point Amount" to however many points you would like the customer to receive per transaction.
-
Set the "Minimum required purchase" amount. Any transaction under this amount will not have loyalty credits applied to the customer.
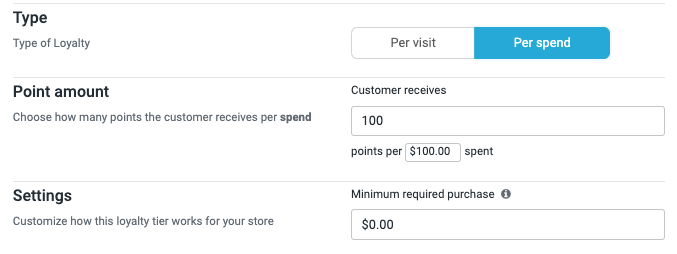
Per Spend
The "Per spend" setting will grant loyalty credits to your customer based on the dollar amount spent during a completed transaction.
-
Set the "Point amount" to award however many points you would like the customer to receive and "Points Per $ spent" to how much the customer must spend to earn those points.
-
In the below example, customers will receive 100 points per $100.00 spent in-store.
-
-
Set the "Minimum required purchase" amount. Any transaction under this amount will not have loyalty credits applied to the customer.
How to Attach Loyalty Tiers to a Customer Profile
Loyalty tiers can be attached to customer profiles individually and automatically for new customers if the tier is set to default.
Individually Adding a Customer to a Loyalty Tier
To add an individual customer to a loyalty tier, you can update their profile on either the dashboard or the POS.
Dashboard:
-
Go to Customers > Customer List
-
Find the customer you want to add to a loyalty tier
-
Click into their profile by either clicking their name or clicking the ellipsis > edit
-
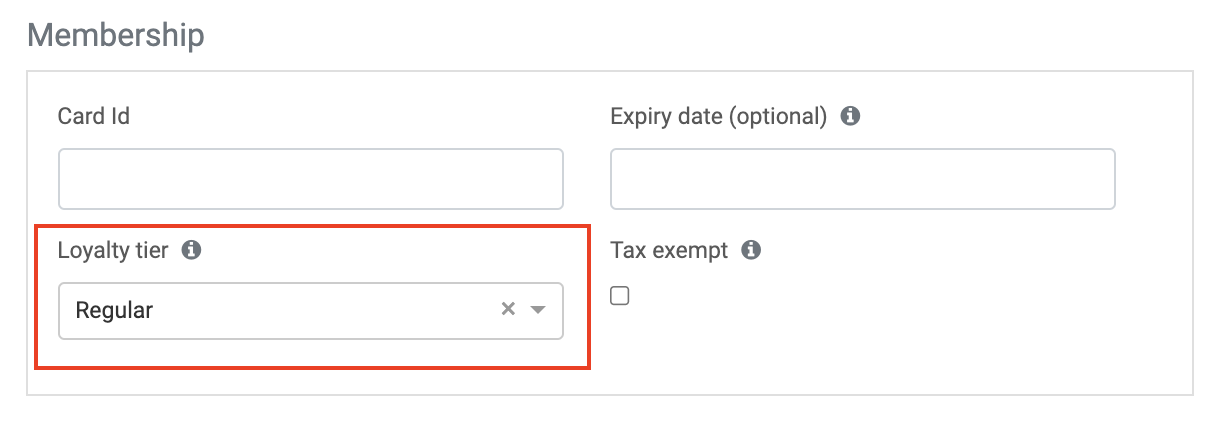
Under the Membership section of their profile, you are able to select the Loyalty tier from the drop-down menu that you'd like the customer to be added to
-
Click save and your changes will be saved
POS:
-
Tap the GR Menu
-
Go to the Customers page
-
Find the customer you want to add to a loyalty tier
-
Tap their name (click Edit on WebPOS)
-
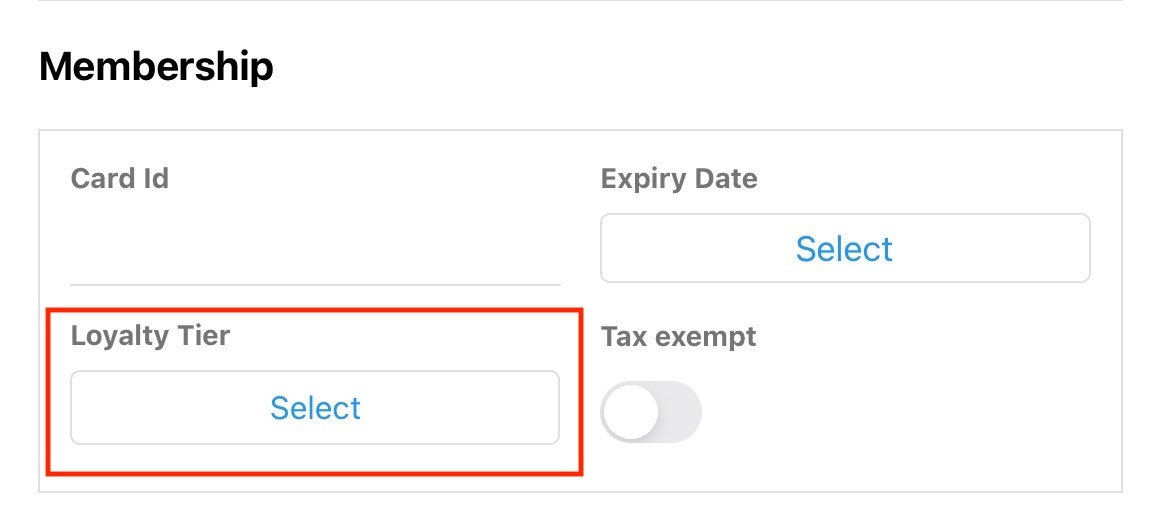
Under the Membership section of their profile, you are able to select the Loyalty tier from the drop-down menu that you'd like the customer to be added to
-
Click save and your changes will be saved
Note: to remove a customer from a loyalty tier simply click the "x" beside the tier name in the Loyalty Tier field and save your changes.
Automatically Adding New Customers to a Loyalty Tier
To create a default loyalty tier that will be automatically added to new customer profiles, you can choose a default tier on the dashboard.
-
Go to Customers > Loyalty
-
Click Edit on the loyalty tier that you want to make the default tier
-
Click the Make your Default Loyalty Tier button (the button will turn green and say default)
-
Click save and your changes will be saved
-
All new customers will automatically be added to this loyalty tier
Deleting a Loyalty Tier
If you need to delete a loyalty tier, it can either be merged with an existing tier or removed altogether. If merged with an existing tier, all customers in the original loyalty tier will be moved over to the newly merged tier and the original deleted. If the tier is removed without merging, the customer will no longer belong to a loyalty tier.
-
Go to Customers > Loyalty
-
Click the ellipsis on the right side of the loyalty tier

-
Click the delete button
-
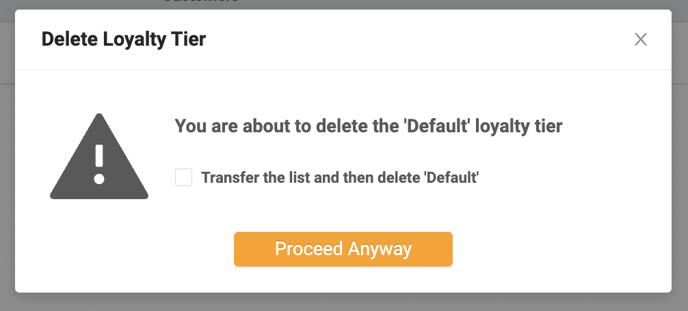
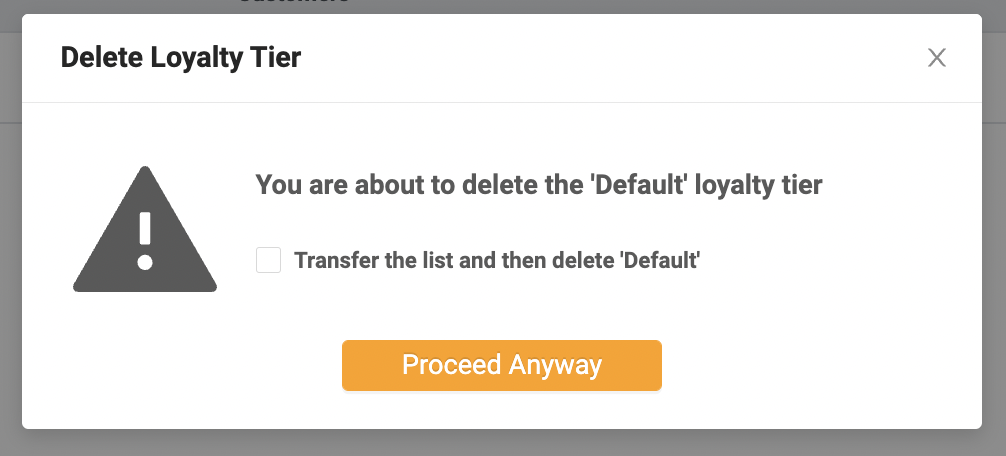
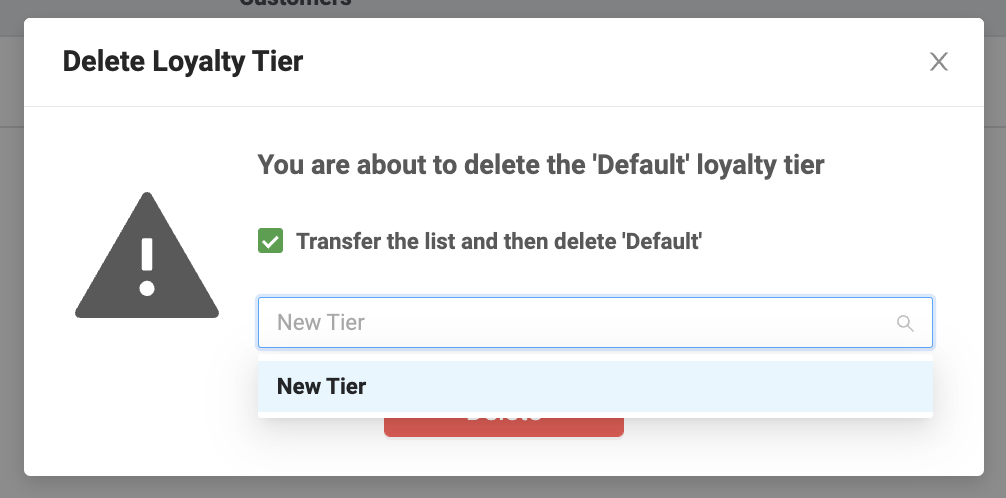
A pop-up will appear asking if you want to proceed with deleting the tier or transfer it to a new loyalty tier. If you would like to add a new tier, check the box and a dropdown will appear

-
Either delete the tier or utilize the transfer dropdown to merge the customers into a new tier and delete the original tier

Why won't my Loyalty tier delete?
If the loyalty tier has discounts associated with it, the discounts must be deleted prior to deleting the tier.
How to Check, Edit and Apply a Customer's Loyalty Credit Balance
A customer's loyalty credit balance can be checked on either the Dashboard or POS. The customer's loyalty balance will also appear when they are added to a cart and can be applied to a purchase in either full or a portion.
Checking Loyalty Credit Balances
Dashboard:
-
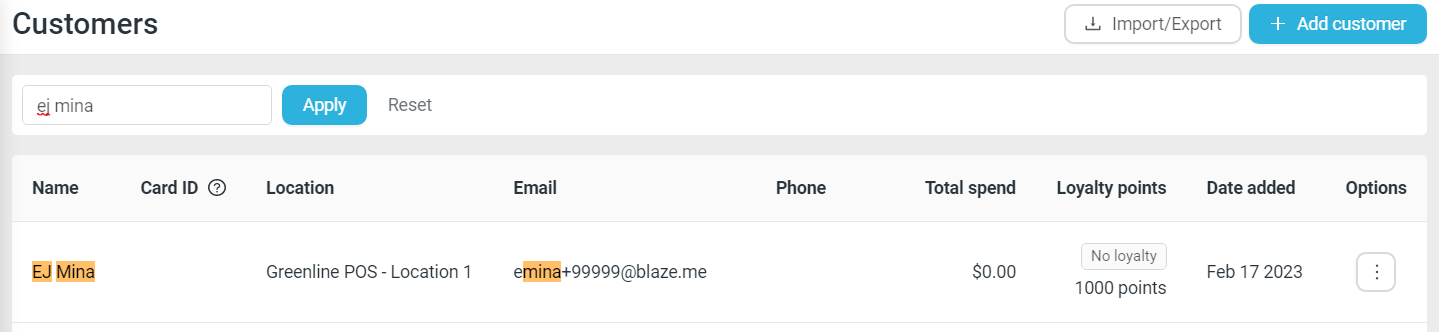
Go to Customers > Customer List
-
Find the customer you're checking the balance for
-
The balance will appear on both the Customer List line item and the customer's profile
POS:
-
Tap the GR Menu
-
Go to the Customers page
-
Find the customer you're checking the balance for
-
The loyalty credit balance will appear on the customer list line item

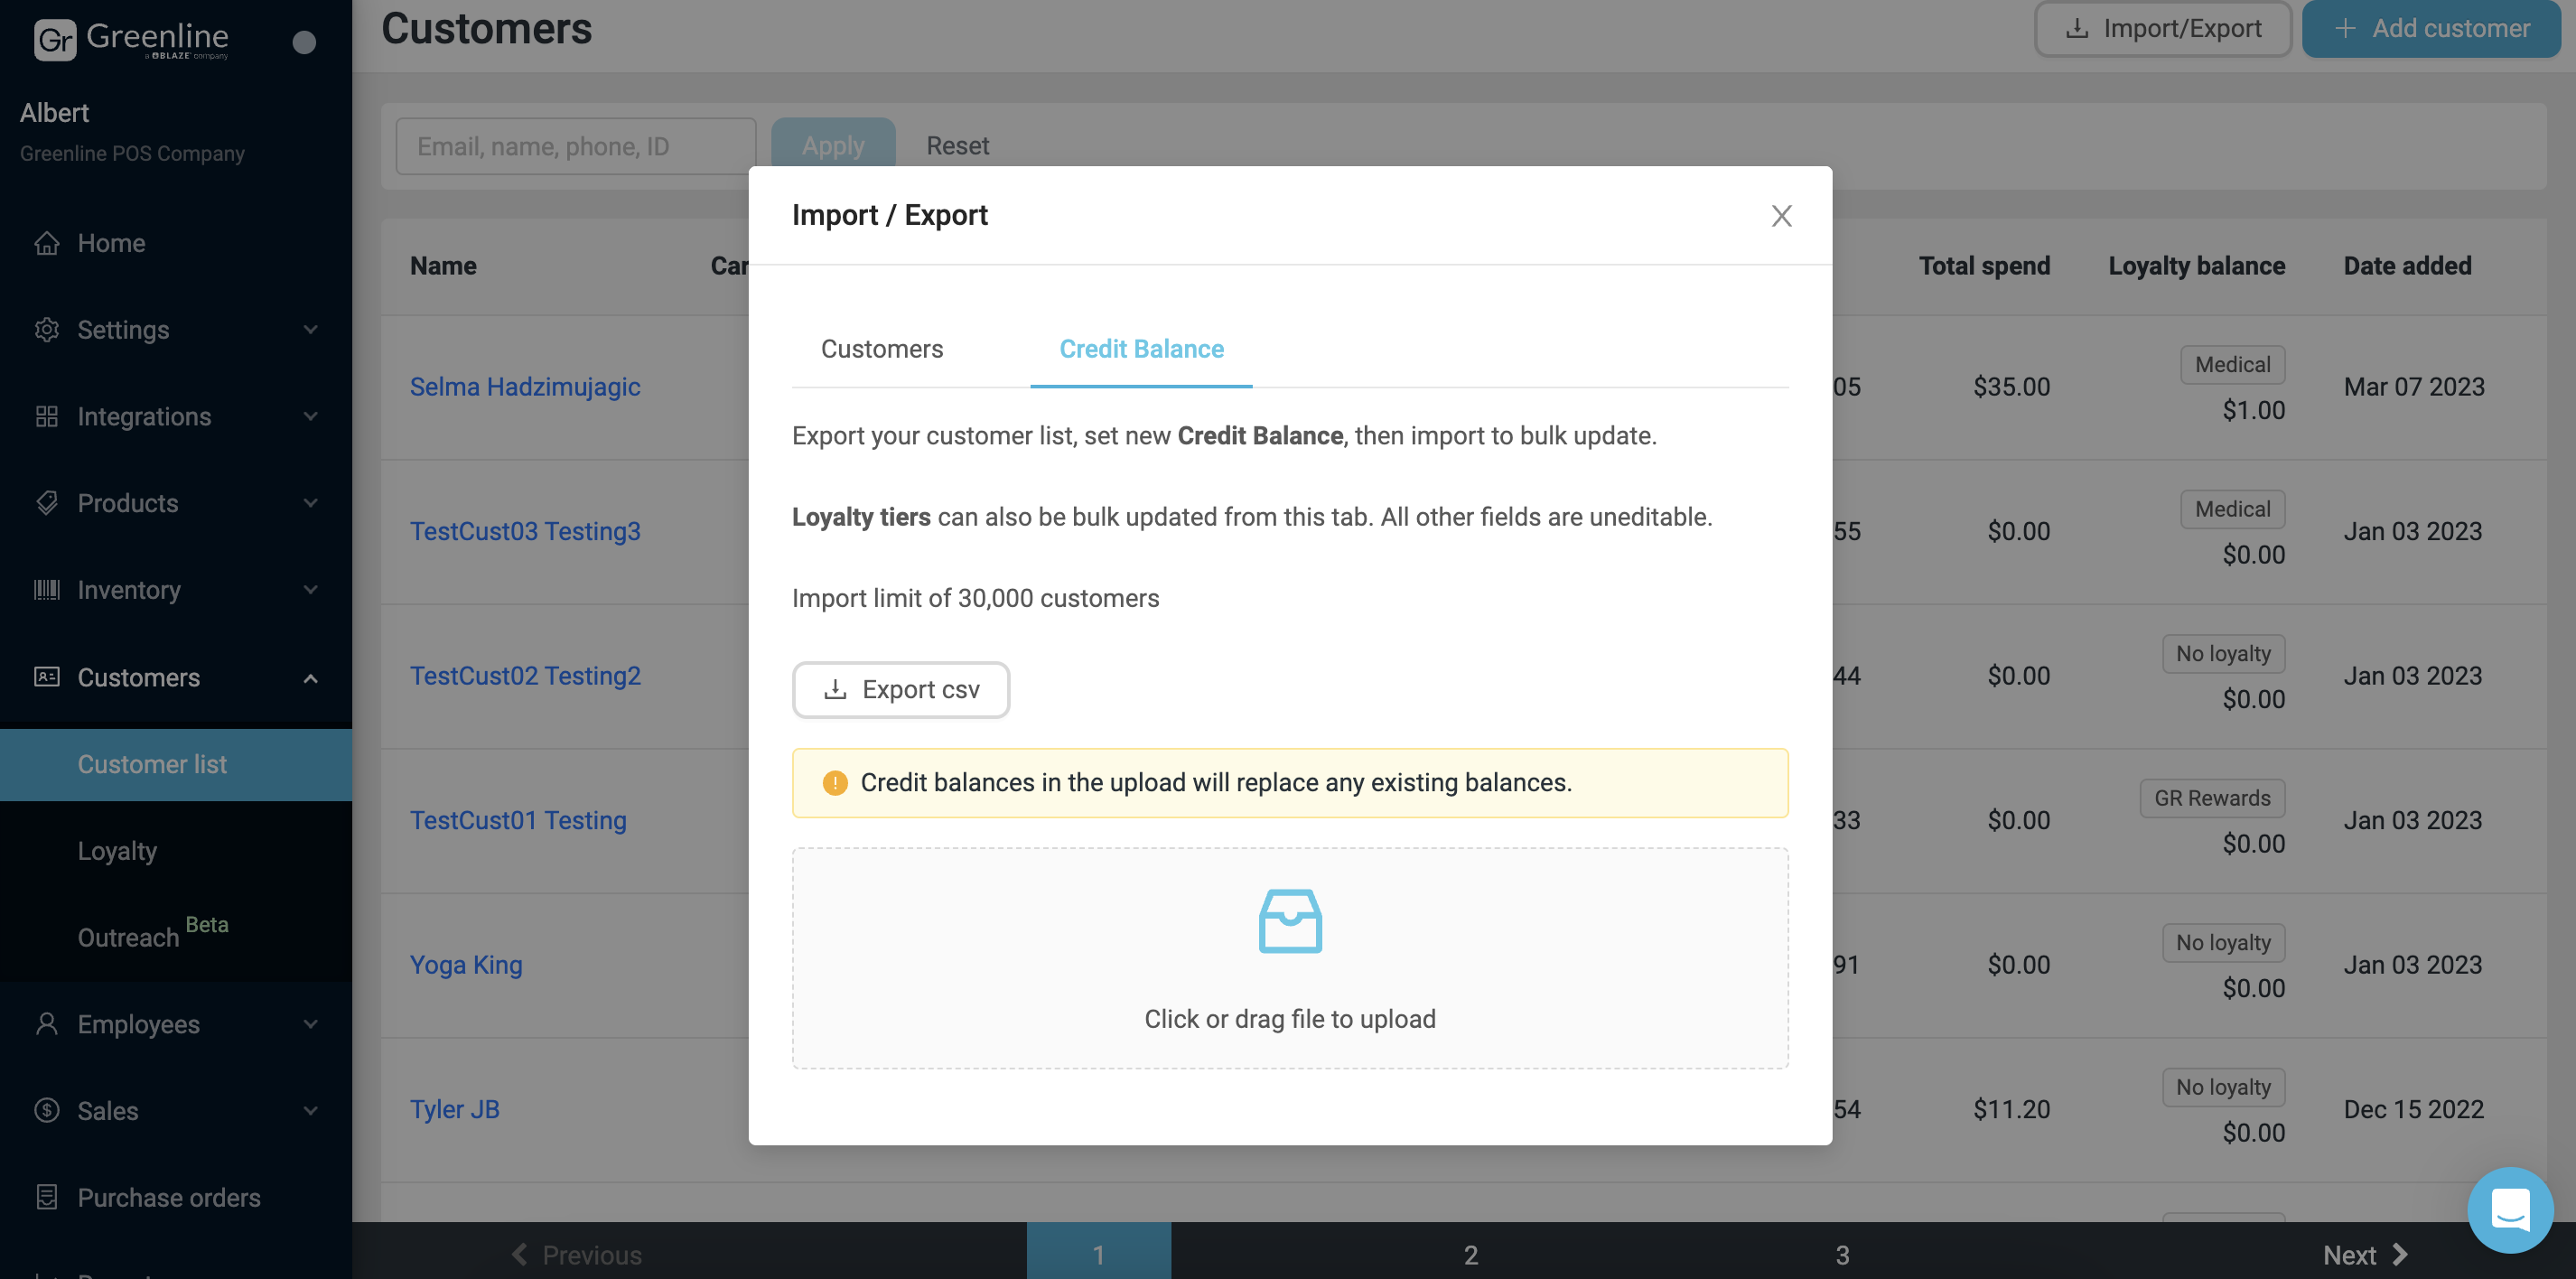
Bulk Updating Loyalty Credits / Tiers
For more information on how to bulk update credits and tiers click here and navigate to the "Importing/Exporting for Bulk Credit Balance Updating" section.
Manually Updating Loyalty Credits
-
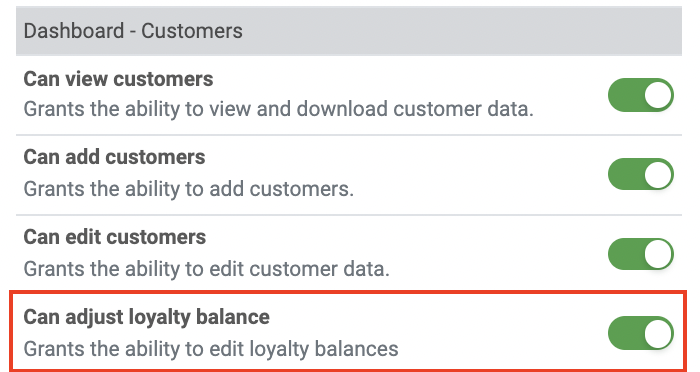
Ensure that your user profile has the appropriate permissions enabled to edit loyalty credits
-
Navigate to the Customers > Customer List page on your dashboard
-
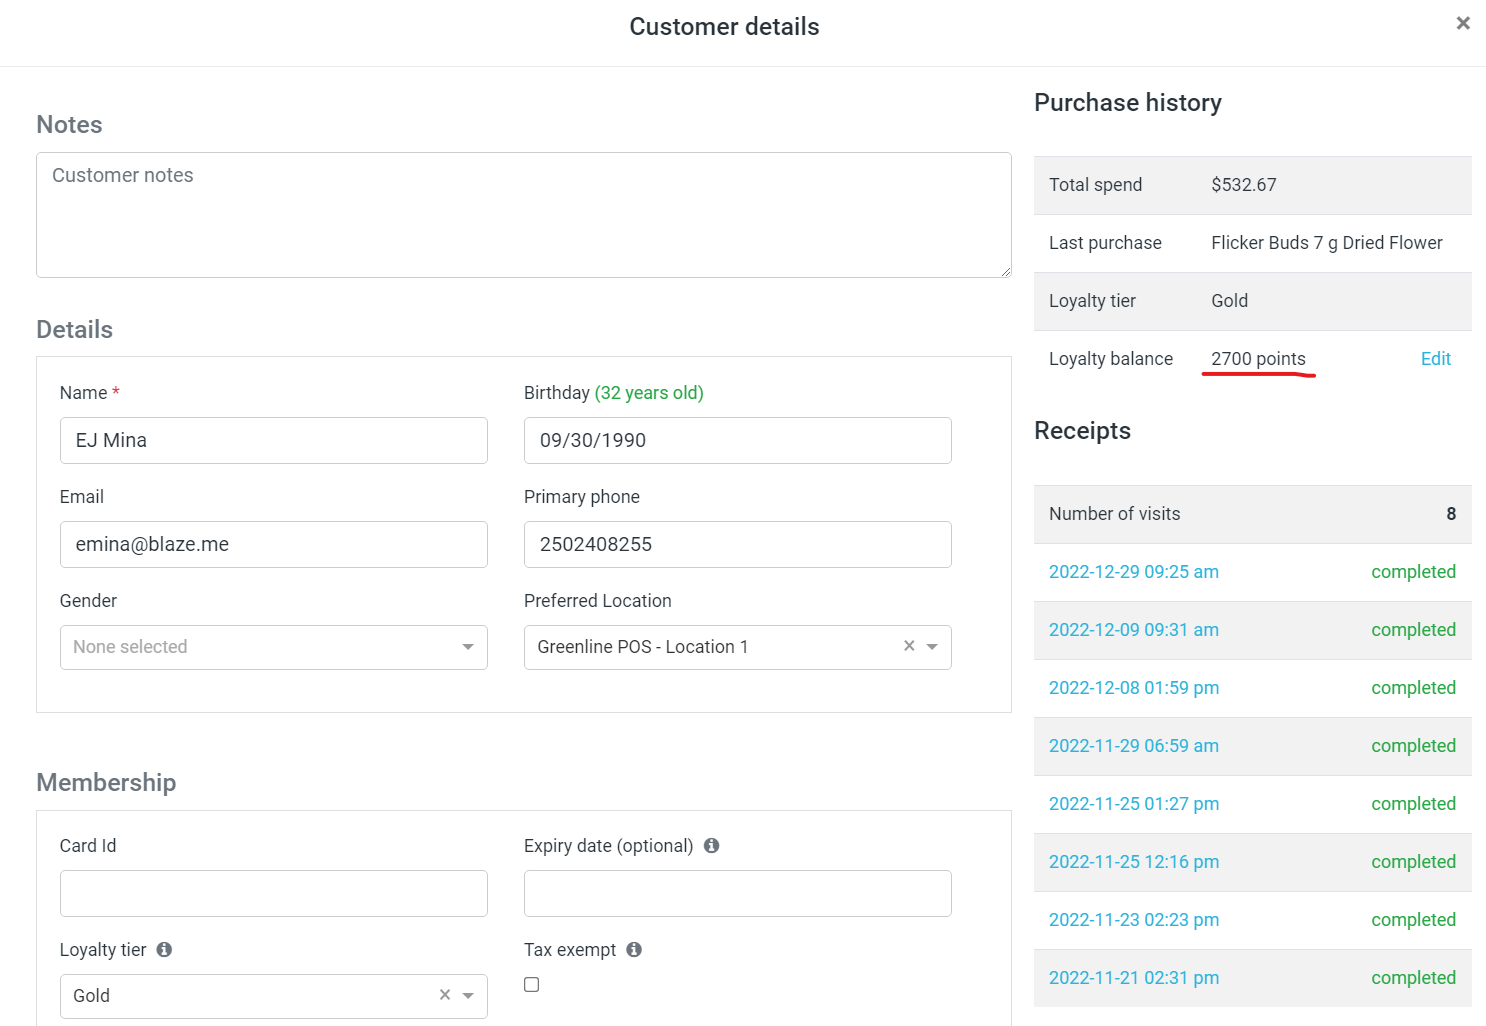
Select the customer whose loyalty credits you want to edit
-
Under the Loyalty balance section click the "Edit" button

-
Enter in the new balance and click save


Applying Loyalty Credit Balances
When making a sale to a customer who has a loyalty credit balance, you can apply that balance to the cart to allow them to spend their credits.
-
Add the customer to the cart. You will see their points balance underneath if they have any.
-4.png?width=656&height=98&name=Untitled+(3)-4.png)
-
Add all of the customer’s products to the cart.
-
Checkout.
-
Select the “Loyalty” payment type. The box will include the customer’s points balance in addition to the dollar value conversion)) This will only be enabled if the customer has a loyalty balance greater than $0.
-4.png?width=688&height=444&name=Untitled+(4)-4.png)
-
Loyalty can be used as a partial payment type in addition to another payment method (ex. cash, credit).
-
Redeemed loyalty balances can be seen as a payment type of receipts.
-4.png?width=688&height=441&name=Untitled+(5)-4.png)
-4.png?hsLang=en)
-4.png?hsLang=en)
-4.png?hsLang=en)
Because loyalty usage is recorded as a payment type and not a discount, information about loyalty spend can be seen on the Reports > Analytics > Payment Types report. Sales taxes are not affected by the usage of loyalty usage.
Loyalty point to dollar ratios can be customized on the Dashboard > Settings > Loyalty page.
How to Add Loyalty Tiers to Discounts
Loyalty tiers can be added to discounts in Greenline. This will give you the ability to easily add a discount to the cart when a customer in a specific loyalty tier is added to that order.
To learn more about creating and editing discounts click here.
-
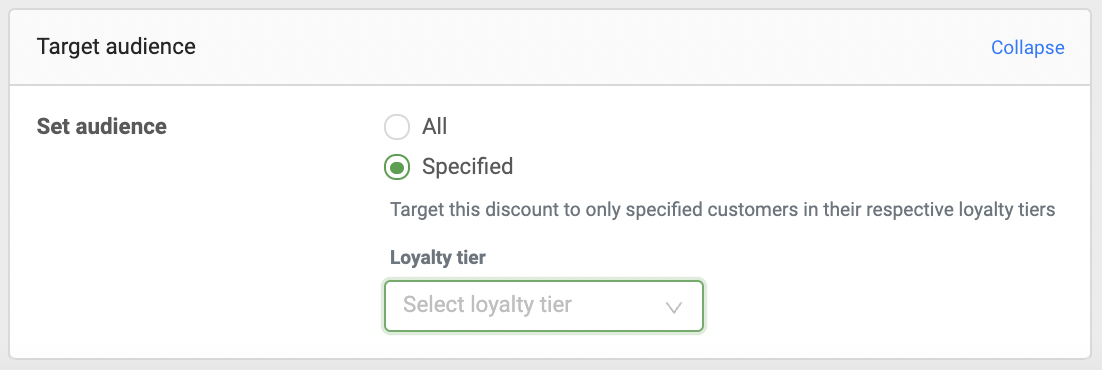
Find the discount that you would like to add the loyalty tier to and click edit
-
Under the target audience section, select specified > choose which loyalty tier you would like the discount to be added to from the dropdown menu
To learn more about redeemable loyalty discounts click here.
Note: loyalty based discounts can be applied to either Automatic discounts or manual discounts. Automatic discounts will not be able to remove loyalty points from a purchase, utilize these discounts for special promotions for members who are part of your loyalty program.
Scannable Customer Barcodes
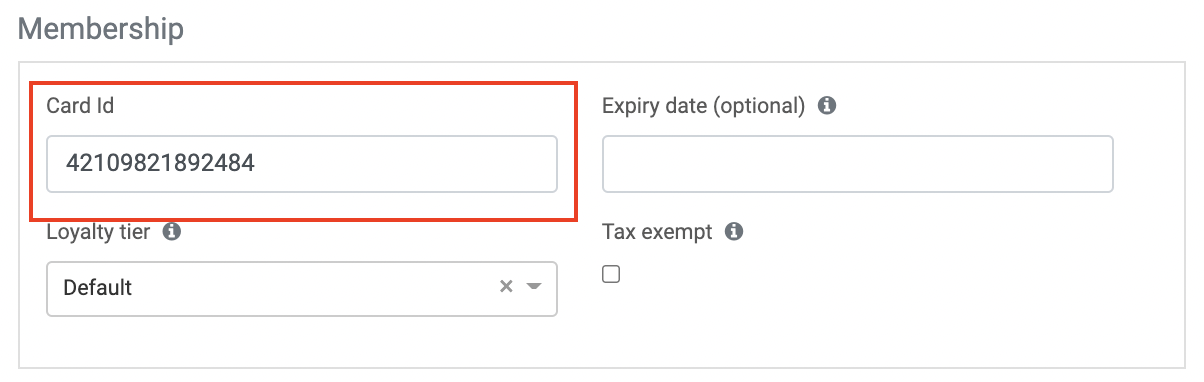
Greenline allows users to add barcodes to a customer profile that can be scanned to automatically add that customer to a sale. This can be useful if you choose to print loyalty cards for your retail store with custom barcodes for each customer.
-
Add the barcode to the Card Id field under the membership section on the customer profile
-
In the POS select Add customer
-
Scan the customer's barcode and they will be added to the cart
